
In this Arduno Machine learning project we're going to use an accelerometer sensor to identify the gestures you play.
This is a remake of the project found on the Tensorflow blog. We're going to use a lot less powerful chip in this tutorial, tough: an Arduino Nano (old generation), equipped with 32 kb of flash and only 2 kb of RAM.
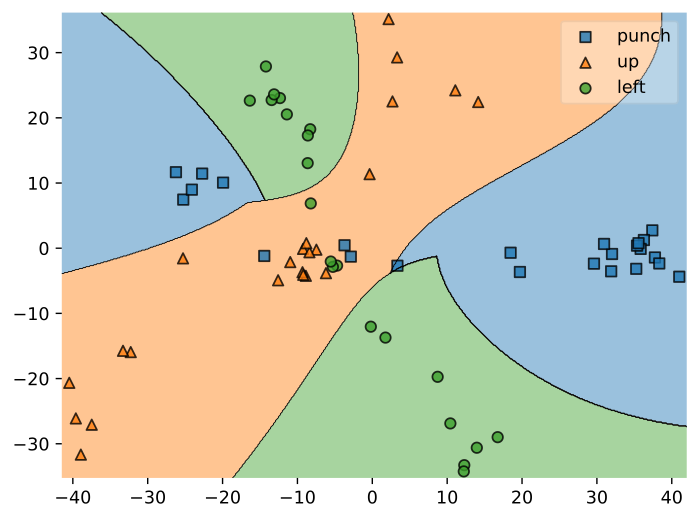
Table of contents
1. Features definition
We're going to use the accelerations along the 3 axis (X, Y, Z) coming from an IMU to infer which gesture we're playing. We'll use a fixed number of recordings (NUM_SAMPLES) starting from the first detection of movement.
This means our feature vectors are going to be of dimension 3 * NUM_SAMPLES, which can become too large to fit in the memory of the Arduino Nano. We'll start with a low value for NUM_SAMPLES to keep it as leaner as possible: if your classifications suffer from poor accuracy, you can increase this number.
2. Record sample data
2.1 Read the IMU sensor
First of all, we need to read the raw data from the IMU. This piece of code will be different based on the specific chip you use. To keep things consistent, we'll wrap the IMU logic in 2 functions: imu_setup and imu_read.
I'll report a couple of example implementations for the MPU6050 and the MPU9250 (these are the chip I have at hand). You should save whichever code you use in a file called imu.h.
#include "Wire.h"
// library from https://github.com/jrowberg/i2cdevlib/tree/master/Arduino/MPU6050
#include "MPU6050.h"
#define OUTPUT_READABLE_ACCELGYRO

MPU6050 imu;

void imu_setup() {
    Wire.begin();
    imu.initialize();
}

void imu_read(float *ax, float *ay, float *az) {
    int16_t _ax, _ay, _az, _gx, _gy, _gz;

    imu.getMotion6(&_ax, &_ay, &_az, &_gx, &_gy, &_gz);

    *ax = _ax;
    *ay = _ay;
    *az = _az;
}
#include "Wire.h"
// library from https://github.com/bolderflight/MPU9250
#include "MPU9250.h"
MPU9250 imu(Wire, 0x68);
void imu_setup() {
Wire.begin();
imu.begin();
}
void imu_read(float *ax, float *ay, float *az) {
imu.readSensor();
*ax = imu.getAccelX_mss();
*ay = imu.getAccelY_mss();
*az = imu.getAccelZ_mss();
}In the main .ino file, we dump the values to Serial monitor / plotter.
#include "imu.h"
#define NUM_SAMPLES 30
#define NUM_AXES 3
// sometimes you may get "spikes" in the readings
// set a sensible value to truncate too large values
#define TRUNCATE_AT 20
double features[NUM_SAMPLES * NUM_AXES];
void setup() {
Serial.begin(115200);
imu_setup();
}
void loop() {
float ax, ay, az;
imu_read(&ax, &ay, &az);
ax = constrain(ax, -TRUNCATE_AT, TRUNCATE_AT);
ay = constrain(ay, -TRUNCATE_AT, TRUNCATE_AT);
az = constrain(az, -TRUNCATE_AT, TRUNCATE_AT);
Serial.print(ax);
Serial.print('\t');
Serial.print(ay);
Serial.print('\t');
Serial.println(az);
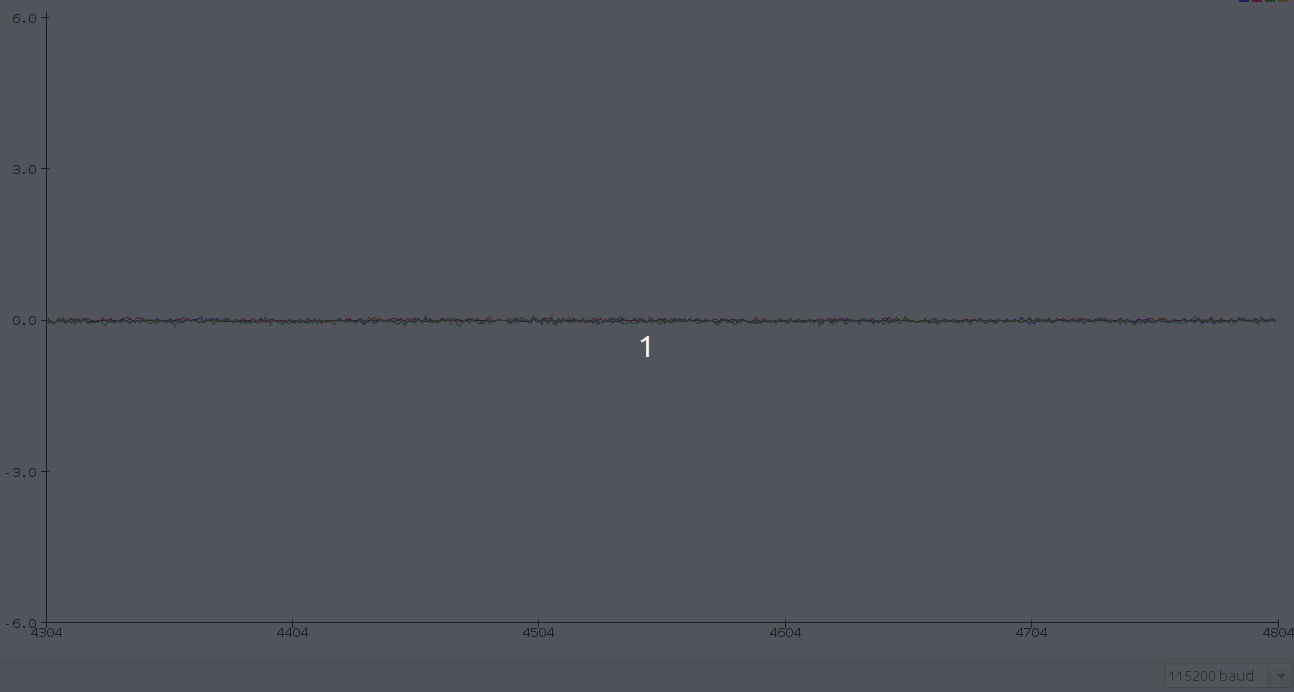
}Open the Serial plotter and make some movement to have an idea of the range of your readings.

2.2 Calibration
Due to gravity, we get a stable value of -9.8 on the Z axis at rest (you can see this in the previous image). Since I'd like to have almost 0 at rest, I created a super simple calibration procedure to remove this fixed offset from the readings.
double baseline[NUM_AXES];
double features[NUM_SAMPLES * NUM_AXES];

void setup() {
    Serial.begin(115200);
    imu_setup();
    calibrate();
}

void loop() {
    float ax, ay, az;

    imu_read(&ax, &ay, &az);

    ax = constrain(ax - baseline[0], -TRUNCATE, TRUNCATE);
    ay = constrain(ay - baseline[1], -TRUNCATE, TRUNCATE);
    az = constrain(az - baseline[2], -TRUNCATE, TRUNCATE);
}

void calibrate() {
    float ax, ay, az;

    for (int i = 0; i < 10; i++) {
        imu_read(&ax, &ay, &az);
        delay(100);
    }

    baseline[0] = ax;
    baseline[1] = ay;
    baseline[2] = az;
}
Much better.
2.3 Detect first motion
Now we need to check if motion is happening. To keep it simple, we'll use a naive approach that will look for an high value in the acceleration: if a threshold is exceeded, a gesture is starting.
If you did the calibration step, a threshold of 5 should work well. If you didn't calibrate, you have to come up with a value that suits your needs.
#include imu.h

#define ACCEL_THRESHOLD 5

void loop() {
    float ax, ay, az;

    imu_read(&ax, &ay, &az);

    ax = constrain(ax - baseline[0], -TRUNCATE, TRUNCATE);
    ay = constrain(ay - baseline[1], -TRUNCATE, TRUNCATE);
    az = constrain(az - baseline[2], -TRUNCATE, TRUNCATE);

    if (!motionDetected(ax, ay, az)) {
        delay(10);
        return;
    }
}

bool motionDetected(float ax, float ay, float az) {
    return (abs(ax) + abs(ay) + abs(az)) > ACCEL_THRESHOLD;
}
2.4 Record features
If no motion is happening, we don't take any action and keep watching. If motion is happening, we print the next NUM_SAMPLES readings to Serial.
void loop() {
    float ax, ay, az;

    imu_read(&ax, &ay, &az);

    ax = constrain(ax - baseline[0], -TRUNCATE, TRUNCATE);
    ay = constrain(ay - baseline[1], -TRUNCATE, TRUNCATE);
    az = constrain(az - baseline[2], -TRUNCATE, TRUNCATE);

    if (!motionDetected(ax, ay, az)) {
        delay(10);
        return;
    }

    recordIMU();
    printFeatures();
    delay(2000);
}

void recordIMU() {
    float ax, ay, az;

    for (int i = 0; i < NUM_SAMPLES; i++) {
        imu_read(&ax, &ay, &az);

        ax = constrain(ax - baseline[0], -TRUNCATE, TRUNCATE);
        ay = constrain(ay - baseline[1], -TRUNCATE, TRUNCATE);
        az = constrain(az - baseline[2], -TRUNCATE, TRUNCATE);

        features[i * NUM_AXES + 0] = ax;
        features[i * NUM_AXES + 1] = ay;
        features[i * NUM_AXES + 2] = az;

        delay(INTERVAL);
    }
}
void printFeatures() {
    const uint16_t numFeatures = sizeof(features) / sizeof(float);

    for (int i = 0; i < numFeatures; i++) {
        Serial.print(features[i]);
        Serial.print(i == numFeatures - 1 ? 'n' : ',');
    }
}
Record 15-20 samples for each geasture and save them to a file, one for each gesture. Since we're dealing with highly dimensional data, you should collect as much samples as possible, to average out the noise.
3. Train and export the classifier
For a detailed guide refer to the tutorial
from sklearn.ensemble import RandomForestClassifier
from micromlgen import port

# put your samples in the dataset folder
# one class per file
# one feature vector per line, in CSV format
features, classmap = load_features('dataset/')
X, y = features[:, :-1], features[:, -1]
classifier = RandomForestClassifier(n_estimators=30, max_depth=10).fit(X, y)
c_code = port(classifier, classmap=classmap)
print(c_code)
At this point you have to copy the printed code and import it in your Arduino project, in a file called model.h.
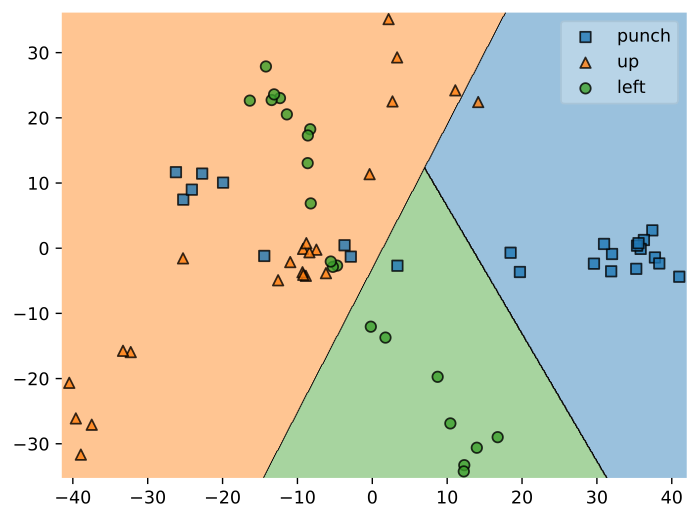
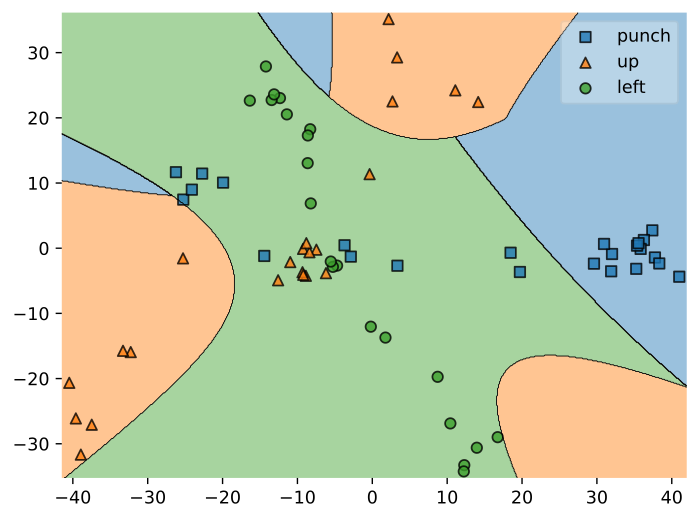
In this project on Machine learning, differently from the previous and simpler ones, we're not achieving 100% accuracy easily. Motion is quite noise, so you should experiment with a few params for the classifier and choose the ones that perform best. I'll showcase a few examples:
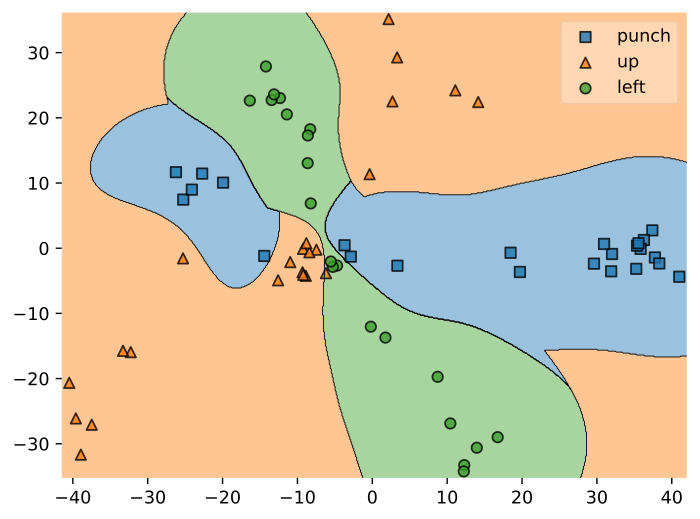
3.1 Select a suitable model
Now that we selected the best model, we have to export it to C code. Here comes the culprit: not all models will fit on your board.
The core of SVM (Support Vector Machines) are support vectors: each trained classifier will be characterized by a certain number of them. The problem is: if there're too much, the generated code will be too large to fit in your flash.
For this reason, instead of selecting the best model on accuracy, you should make a ranking, from the best performing to the worst. For each model, starting from the top, you should import it in your Arduino project and try to compile: if it fits, fine, you're done. Otherwise you should pick the next and try again.
It may seem a tedious process, but keep in mind that we're trying to infer a class from 90 features in 2 Kb of RAM and 32 Kb of flash: I think this is an acceptable tradeoff.
We're fitting a model to infer a class from 90 features in 2 Kb of RAM and 32 Kb of flash! Click To TweetI'll report a few figures for different combinations I tested.
| Kernel | C | Gamma | Degree | Vectors | Flash size | RAM (b) | Avg accuracy |
|---|---|---|---|---|---|---|---|
| RBF | 10 | 0.001 | - | 37 | 53 Kb | 1228 | 99% |
| Poly | 100 | 0.001 | 2 | 12 | 25 Kb | 1228 | 99% |
| Poly | 100 | 0.001 | 3 | 25 | 40 Kb | 1228 | 97% |
| Linear | 50 | - | 1 | 40 | 55 Kb | 1228 | 95% |
| RBF | 100 | 0.01 | - | 61 | 80 Kb | 1228 | 95% |
As you can see, we achieved a very high accuracy on the test set for all the classifiers: only one, though, fitted on the Arduino Nano. Of course, if you use a larger board, you can deploy the others too.
RAM column: all the values are equal: this is because in the implementation is independant from the number of support vectors and only depends on the number of features.4. Run the inference
#include "model.h"

void loop() {
    float ax, ay, az;

    imu_read(&ax, &ay, &az);

    ax = constrain(ax - baseline[0], -TRUNCATE, TRUNCATE);
    ay = constrain(ay - baseline[1], -TRUNCATE, TRUNCATE);
    az = constrain(az - baseline[2], -TRUNCATE, TRUNCATE);

    if (!motionDetected(ax, ay, az)) {
        delay(10);
        return;
    }

    recordIMU();
    classify();
    delay(2000);
}

void classify() {
    Serial.print("Detected gesture: ");
    Serial.println(classIdxToName(predict(features)));
}
Here we are: it has been a long post, but now you can classify gestures with an Arduino Nano and 2 Kb of RAM.
No fancy Neural Networks, no Tensorflow, no 32-bit ARM processors: plain old SVM on plain old 8 bits with 97% accuracy. Click To TweetHere's a short demo of me playing 3 gestures and getting the results on the serial monitor.
Project figures
On my machine, the sketch targeted at the Arduino Nano (old generation) requires 25310 bytes (82%) of program space and 1228 bytes (59%) of RAM. This means you could actually run machine learning in even less space than what the Arduino Nano provides. So, the answer to the question Can I run machine learning on Arduino? is definetly YES.
Did you find this tutorial useful? Was is it easy to follow or did I miss something? Let me know in the comments so I can keep improving the blog.
Check the full project code on Github