Quick Start
This Quick Start guide will guide you through installing OpenPnP, seeing the major components of the interface and running a sample job in the OpenPnP simulator. This will allow you to quickly understand how OpenPnP works and give you a foundation to begin hooking it up to your own machine.
Visit http://openpnp.org/downloads to find out how to download the latest snapshot or release of OpenPnP.
If you are using one of the binary installers from the website, just run the installer and follow the instructions. After installation you can run OpenPnP from your operating system's applications list, i.e. Start Menu, Applications folder, etc.
If you are using an archive version of OpenPnP, unzip the software into a directory of your choosing. Typically this would be the same place you keep your other applications. Inside the folder you unzipped OpenPnP to there is an openpnp.sh and openpnp.bat script. These should work for Windows, Mac and Linux. For Mac and Linux, run openpnp.sh and for Windows run openpnp.bat. After a short wait you should see the OpenPnP Main Window.
This image shows the major components of the user interface. We'll reference the names of these components throughout the rest of the guide, so take a moment to get familiar with them.

OpenPnP is set up out of the box so that you can use it right away; you don't even a need to connect a machine!
When you start OpenPnP for the first time you will see a simulated pick and place table in the camera view. Try following along with the items below to get a feel for how OpenPnP works:
- Press the green power button
to start the virtual "machine".
- Use the jog buttons
in the jog controls to move the camera around. You can change the distance each click moves by changing the value of the Distance slider.
- Visit each of the tabs along the top of the window to see how Jobs, Parts, Packages, Feeders and the Machine is configured. Right now it's best not to change anything.
If you'd like to get right to seeing OpenPnP in action you can skip this section and refer back to it later.
The demo configuration you see when you first start OpenPnP includes simulated cameras, feeders, nozzles, and everything else that makes an OpenPnP machine. In particular, what you see in the camera view is a small window into a much larger virtual pick and place machine. The full machine looks like this:
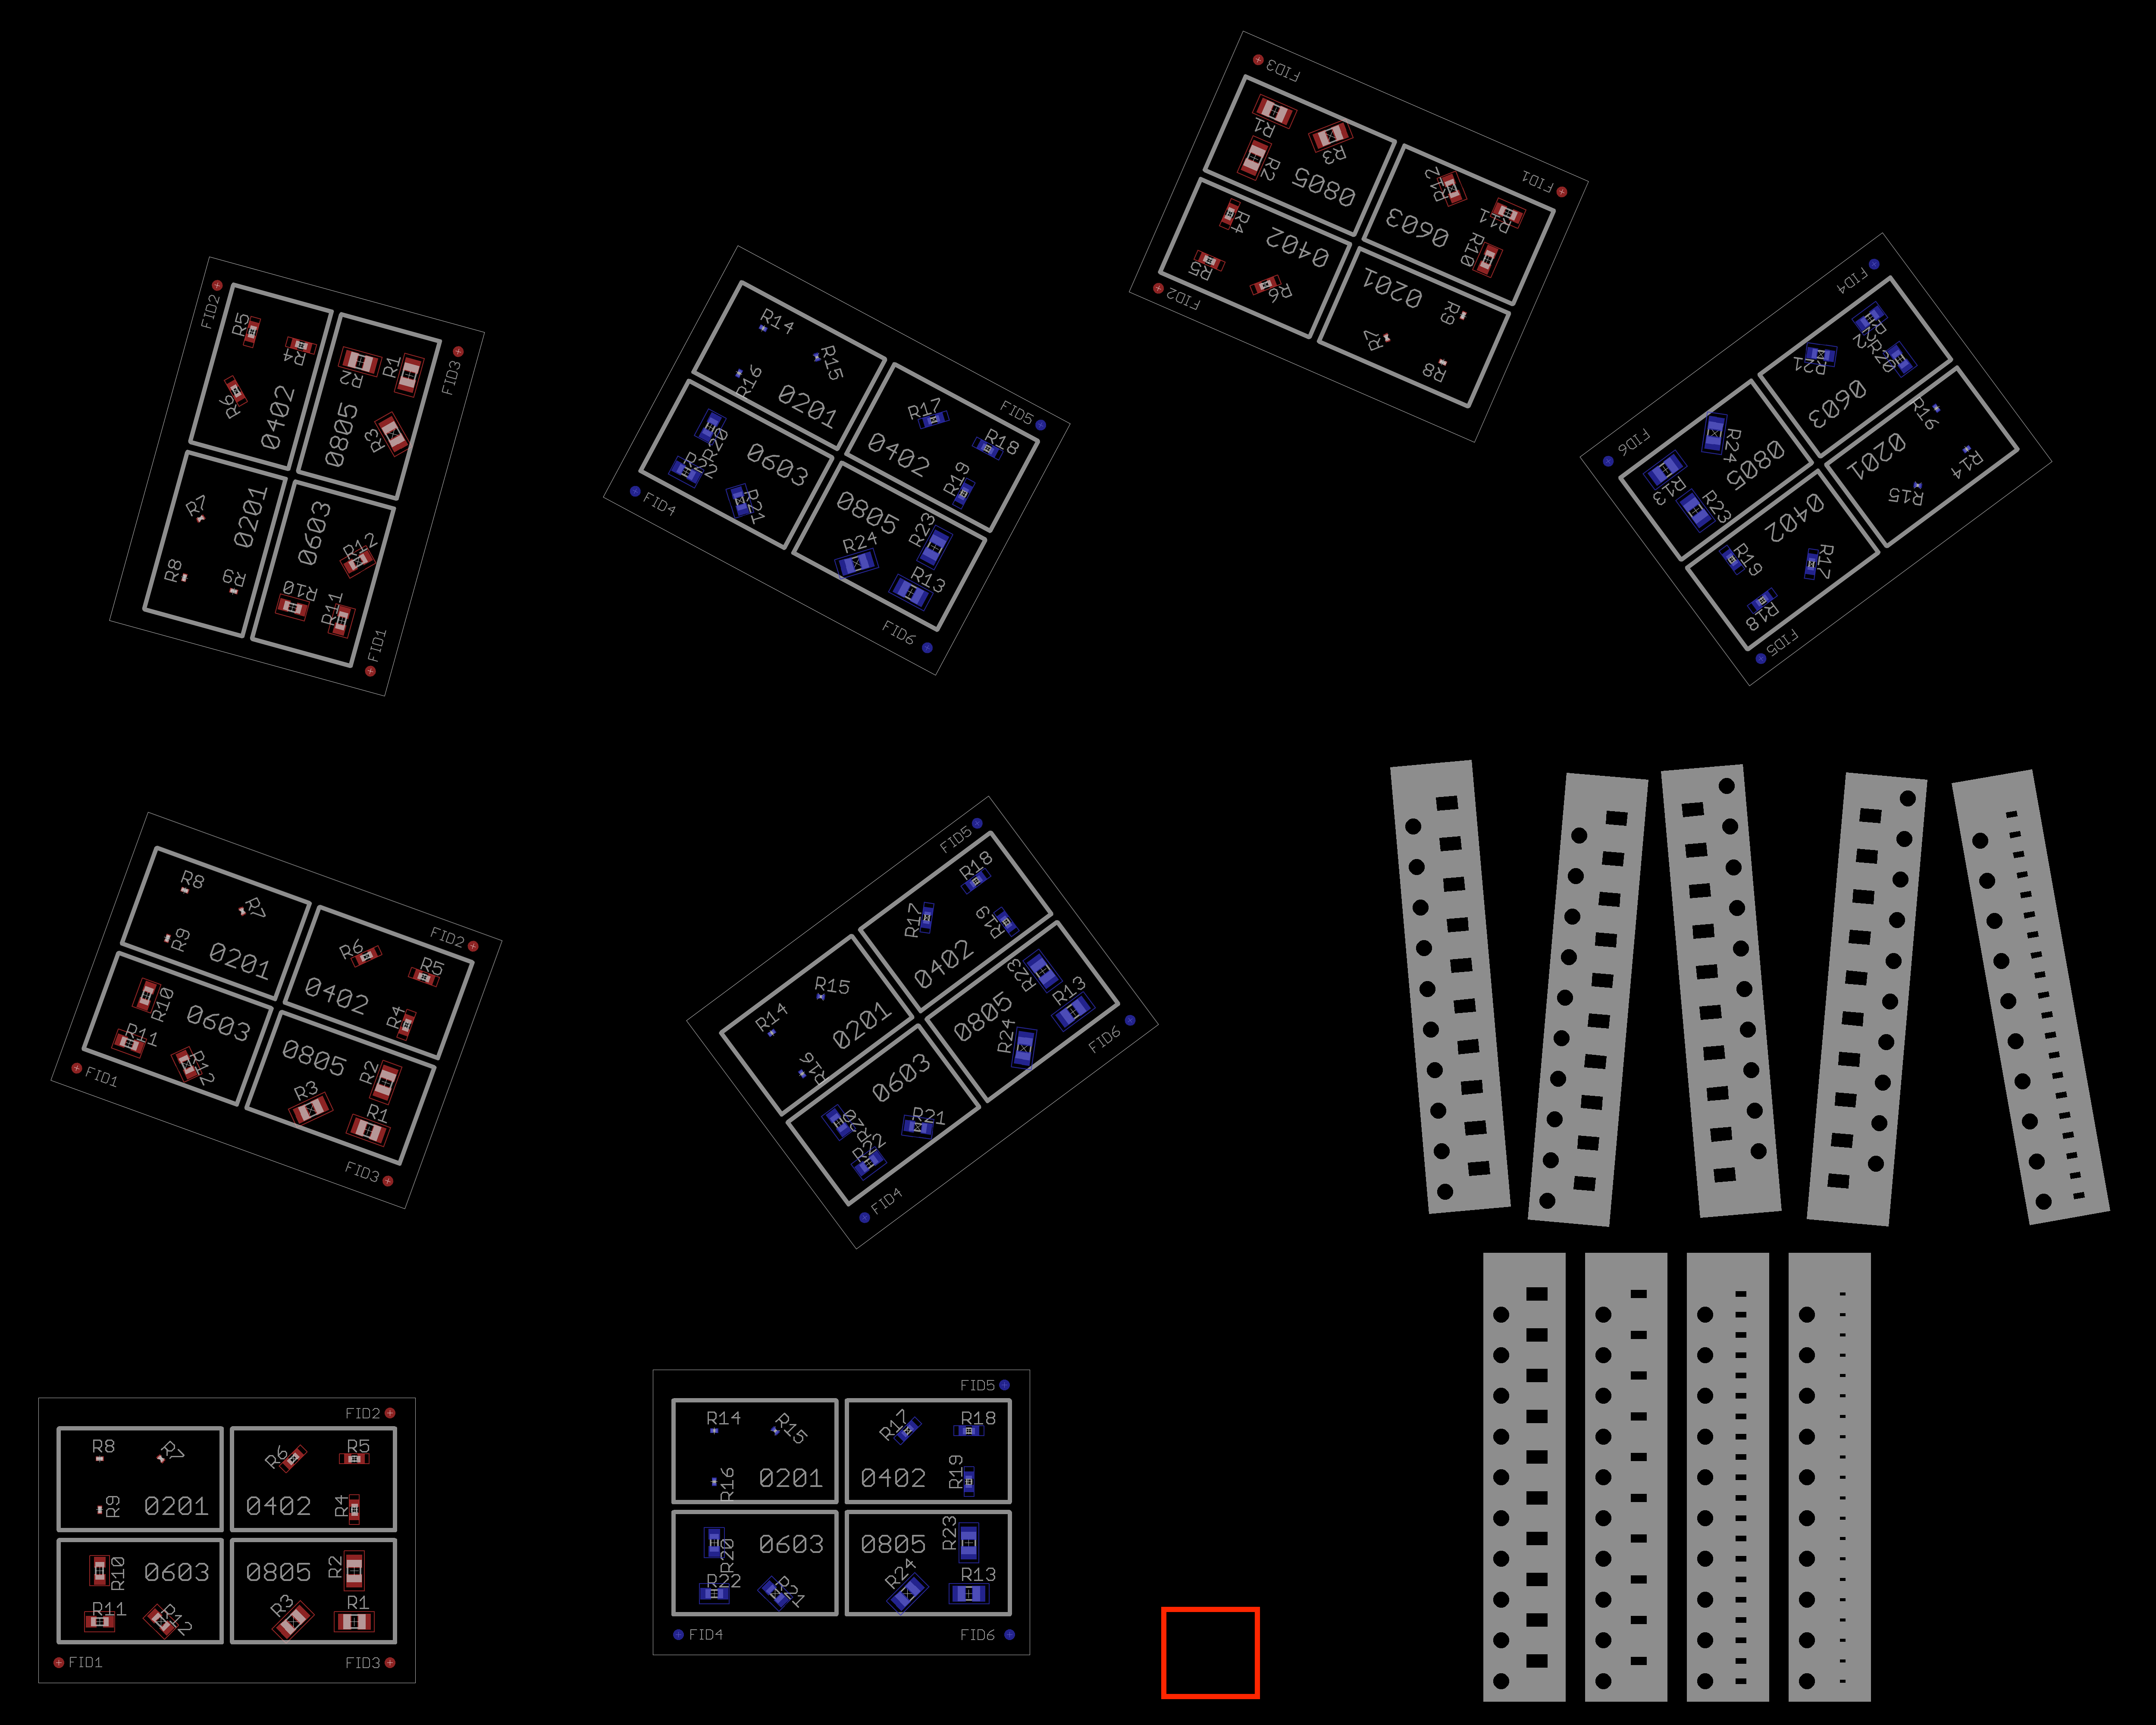
The machine includes 8 boards in different orientations, 9 strip feeders labeled Upper Strip 1 - 4, and Lower Strip 1 - 4, and a red rectangle showing the location of the simulated bottom vision camera.
Now that you've seen the user interface a bit, it's time to try running a pick and place job. Follow along with the instructions below:
- Select the Job tab at the top of the main OpenPnP window.
- From the File menu, select Open Job.
- Using your computer's file dialog, find the
samplesdirectory that came with OpenPnP. On Windows it's in yourDocuments\OpenPnPdirectory. On Mac and Unix it is in the same directory you installed OpenPnP into. - In the
samplesdirectory, find thepnp-testdirectory and open thepnp-test.job.xmlfile inside it. - You'll see the job has loaded and there are now boards and placements listed. You can browse the boards and placements to see what the job will be doing.
- If you haven't already, press the green power button
- Press the green play button
to start the job and the camera will start moving.
OpenPnP will now simulate a full pick and place job. It will use computer vision to align the boards using fiducials, find parts in virtual feeders, and then place the parts on virtual boards. You can follow along by watching the camera view.
When the job is complete, congratulations! You've run a job in OpenPnP! The next step is to dive into the User Manual and start learning how to hook OpenPnP up to a real machine.
Next you should start reading the User Manual to get a better feel for the more advanced features of OpenPnP, and to learn how start integrating the software with your machine.
If you don't have a machine yet, visit http://openpnp.org/hardware/ to see some options for building or buying a machine.
If you want to dive into the code, have a look at the Developers Guide to start hacking.
For help or just conversation, join the discussion group, or come chat with us on Freenode IRC at #openpnp. If you don’t have an IRC client, you can use this web based one.
 Search the Wiki