A brief tutorial explaining how to configure and set-up a remote iOS build process on Unreal Engine 4 (v4.22+) for testing purposes, without spend money and time on a iOS developer license.
Creating mobile provision files
Remote iOS project set-up
Mobileprovision tester

Setting-up remote build machine (Mac)
User Profile
The user name must be password protected (ssh remote control won’t work without a protected profile). The user name can’t have spaces and special characters
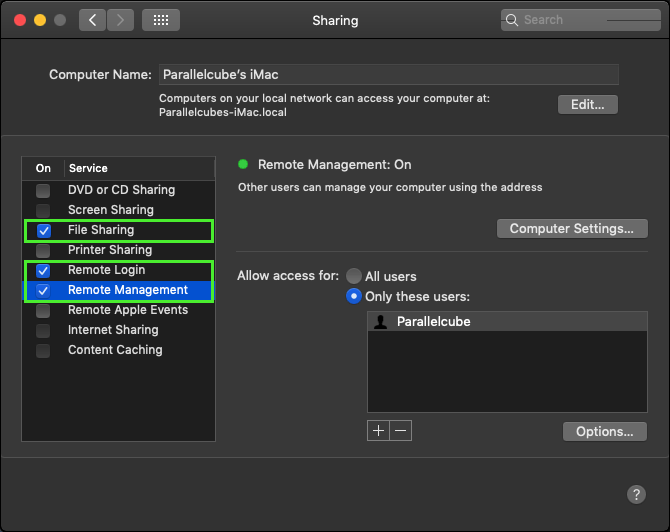
In System Preference > Sharing

We must enable.
- File Sharing
- Remote Login
- Remote Management.
RSync
Rsync is an utility used by Unreal Engine to efficiently tranfer and synchronize files between a computer and an external disk and across networked computers by comparing the modification times and sizes of files.
Before start the configuration of the UE4 project we need to setup Rsync in our Mac machine.
We need to create a rsync.plist file into /Library/LaunchDaemons
Make sure the permissions of the file are -rw-r--r-- and paste:
<?xml version="1.0" encoding="UTF-8"?>
<!DOCTYPE plist PUBLIC "-//Apple Computer//DTD PLIST 1.0//EN" "http://www.apple.com/DTDs/PropertyList-1.0.dtd">
<plist version="1.0">
<dict>
        <key>Disabled</key>
        <false/>
        <key>Label</key>
        <string>rsync</string>
        <key>Program</key>
        <string>/usr/bin/rsync</string>
        <key>ProgramArguments</key>
        <array>
                <string>/usr/bin/rsync</string>
                <string>--daemon</string>
        </array>
        <key>inetdCompatibility</key>
        <dict>
                <key>Wait</key>
                <false/>
        </dict>
		<key>Sockets</key>
		<dict>
			<key>Listeners</key>
			<dict>
				<key>SockServiceName</key>
				<string>rsync</string>
				<key>SockType</key>
				<string>stream</string>
			</dict>
		</dict>
</dict>
</plist>
And a rsyncd.conf into /etc/
Make sure the permissions of the file are rw-r–r– and paste:
[root]
path = /
hosts allow = 192.168.1.0/24
uid = root
gid = wheel
read only = false
comment = Root volume
Hosts are the ip addresses, separate by comma, that can use this machine as the build machine. We have all machines in a local network using 192.168.1.x
To test the load of the module we can run
sudo launchctl load /Library/LaunchDaemons/rsync.plist
And finally restart our Mac machine.
Setting-up UE4 project machine (Windows)
iTunes
IOS development for UE4 now requires iTunes 12 or higher, so we need to download and install the desktop version of iTunes.
Scroll down until Looking for other version? and Windows
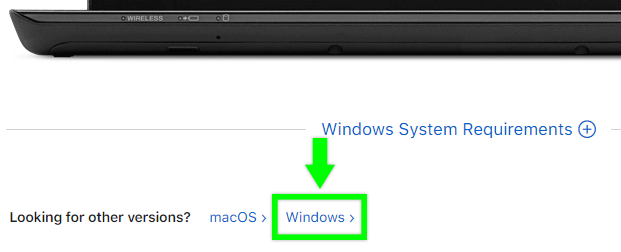
And download iTunes for Windows

If after installation UE4 continues saying that iTunes is not installed we need to open the windows register and check if we are missing the needed entry for UE4.
Open regedit and go to HKEY_LOCAL_MACHINE\SOFTWARE\WOW6432Node\Apple Inc.\Apple Mobile Device Support\Shared

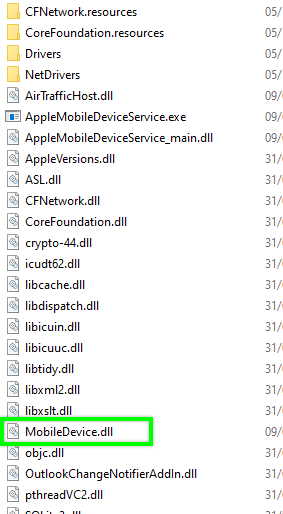
We need and entry MobileDeviceDLL with the path to MobileDevice.dll, create a new String value with this information if the MobileDeviceDLL is missing.
This .dll can be found in C:\Program Files\Common Files\Apple\Mobile Device Support after the iTunes installation.
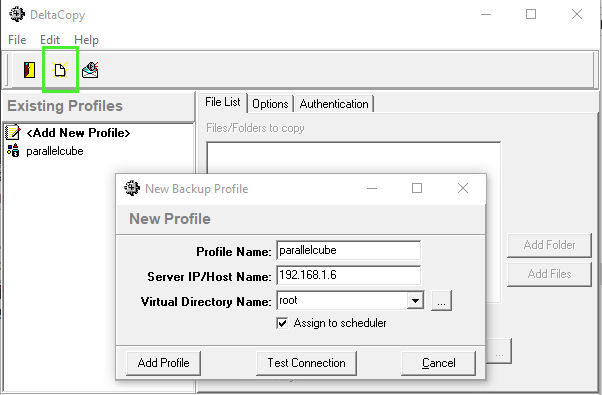
DeltaCopy
To use RSync on Windows we must install DeltaCopy
Run the DeltaC.exe and setup it.
- Profile Name: Must be the same as the name of the user name on Mac.
- Server IP: Our Mac machine IP
- Directory Name: root
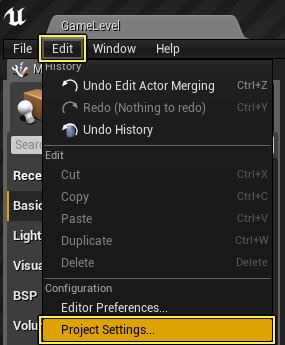
Now we can start to configure the Unreal Engine 4 project to set-up and enable the remote iOS build
Go to Top Menu Edit > Project settings
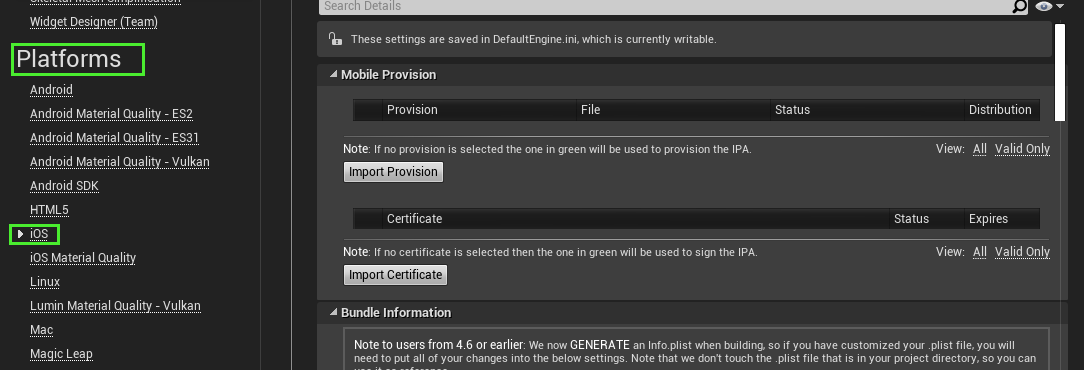
Platforms section > iOS
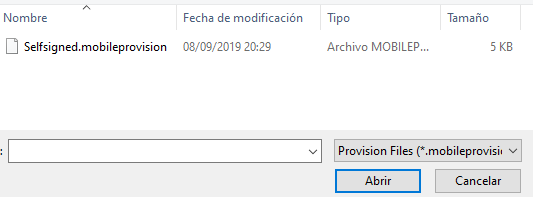
In Mobile Provision > Click on Import Provision button
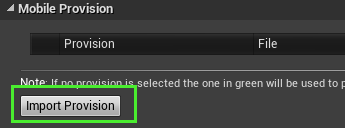
Select the .mobileprovision file created in the previous tutorial and Open
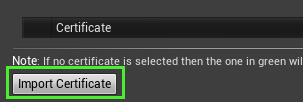
After that click on Import Certificate
Select the .p12 file and Open
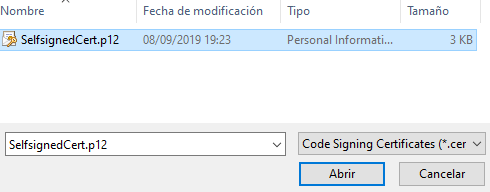
During the certificate import process a dialog will appear to request the password of this certificate. We need to put the password used to export the certificate in the previous tutorial.
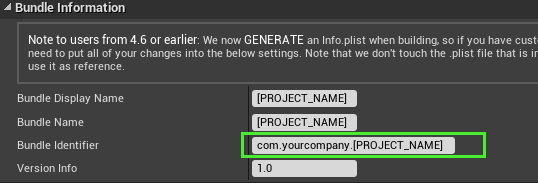
Now in the Mobile Provision section must appear two new entries with a Valid status value.
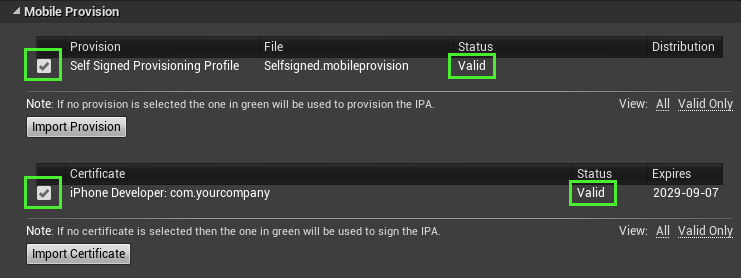
We need to check that the Bundle Identifier starts with the name of the company of the provision file
Scroll down until Build section > Remote Build Options and fill the next fields:
- Remote Server Name: Our Mac machine IP
- RSync User Name: The name of our previous DeltaCopy profile
- Delta Copy Install Path: Path to our DeltaCopy program
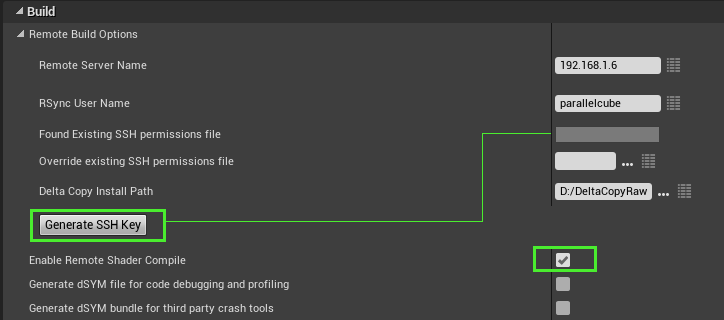
Now we can click on Generate SSH Key button. This process will connect to the Mac machine to generate the SSH Key and copy it back to a folder in the windows machine.
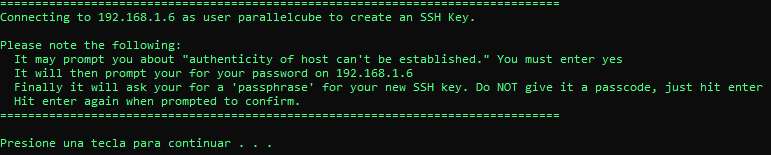
Follow the console instructions until the end, but left the phassphrase empty.
After that the Found Existing SSH permission file field will be automatically filled with the path to the ssh key file
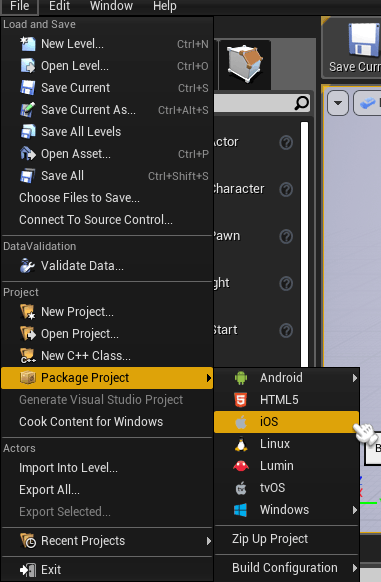
Now we can Package our project for iOS using a remote build from the
top Menu File > Package Project > iOS
And that’s all, now we can continue working on our Windows platform and package the project for iOS platform without physically switch to the Mac machine, and without spend money in a iOS developer license only for testing purposes.
Removing provision files
If we want to remove a provision file or a certificate on Windows platform we can go to
C:\Users\xxxx\AppData\Local\Apple Computer\MobileDevice\Provisioning Profiles\

Select the provision and just delete it from the disk
To remove the certificate we can open a Command prompt and run Certmgr to open the Certificate Manager tool.
Go to Personal > Certificates
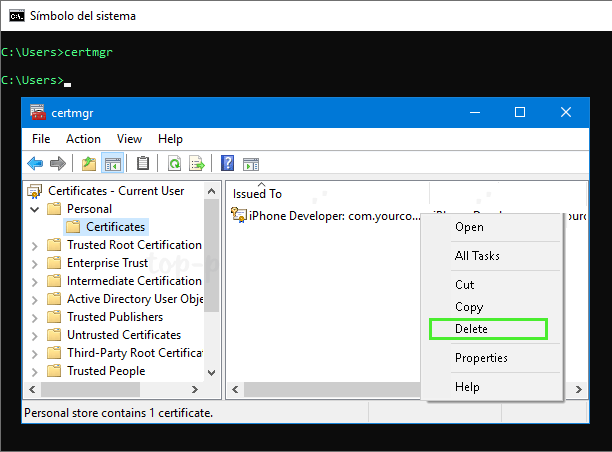
Right click on the certificate and Delete
Part 3: Mobileprovision tester
2020/10/06 – Updated to include iTunes requirements and UE4 4.25
You may also like:

Support this blog!
For the past year I've been dedicating more of my time to the creation of tutorials, mainly about game development. If you think these posts have either helped or inspired you, please consider supporting this blog. Thank you so much for your contribution!


Thank you for the tip! In terms of the file permission part, you seem to provide a typo version of chmod (rw-r–r–), the correct version is -rw-r–r–